|
|
|

|

|

|

|

|

|

|

|

|
|
|
|

|
|
|

|

|
|
|
|
No-Cal Plan Links - Click aircraft name for model |
 |
o
o o o o o o o o o o o o o o o o o o o o o o o |
o
o o o o o o o o o o o o o o o o o o o o o o |
o
o o o o o o o o o o o o o o o o o o o o o |
|
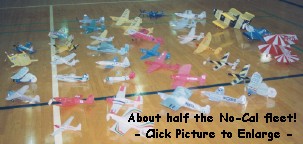
What's a No-Cal?
"No-Cal" is short for "No-Calorie", which is another way of describing "skinny", or profile models. The neat thing about No-Cals is that they provide great flight potential while still being recognizable as the real aircraft they represent. My No-Cal Designs - Perfect for Flying Aces club contests! |
|
My No-Cal Designs have ALL been flight-tested, and several are multiple contest winners. With the exception of novelty designs like the Flying Flea, Starr Bumble Bee, and XF5U-1 Flying Pancake, all are capable of at least 1 minute 30 second flights. If you've got a high ceiling flying site, many are capable of flights exceeding 3 minutes, and several designs consistantly exceed 4 minutes. |
|

|
|
AERO ACES is a TRADEMARK of Michael A. Morrow. © All Images, drawings, plans, articles, and kits, are Registered & Copyrighted by Michael A. Morrow |