| Back to the Plastic Scale Modeling page |

|
|
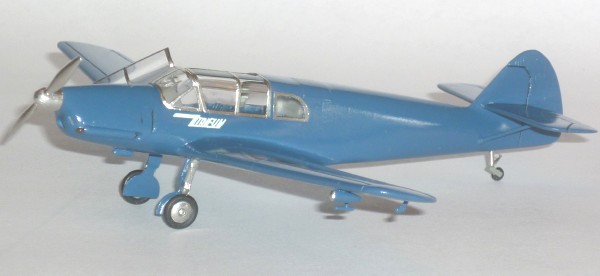
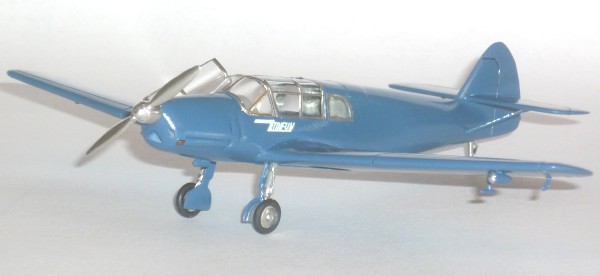
Messerschmitt Bf-108 Taifun the 1/72 scale Heller kit 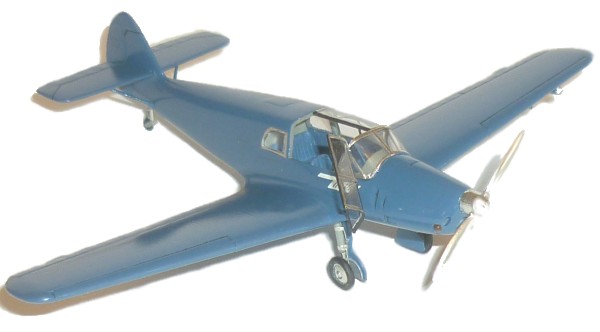 This model was built pretty much out of the box with some minor details added. It was a build for a Trainer Display at the Museum of Flight, so I needed a relatively simple color scheme, which I found via a color slide in my Dad's slide collection. I took a couple of pictures during the course of the Bf-108 build to document the progress. |
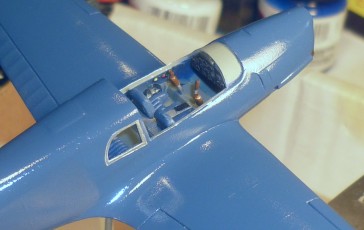
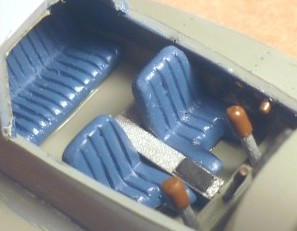 As per usual, the build started with the cockpit. I had intended to built it strictly per kit, allowing the relatively thick cockpit glass to obscure the details, because it would be inside a glass case anyway, but in one of those odd moments of inattention and absentmindedness, I found myself holding a razor saw in one hand, and two canopy halves in the other. I had absentmindedly cut the canopy in half so that it could be displayed in the open position! In for a penny, in for a dollar, I perused Bf-108 cockpit photographs to see what would be most visible with one of the canopy halves hinged in the open position. One of the most noteworthy aspects of the Bf-108's cockpit visible in period photographs was the plush blue leather upholstery on the seats, which was the same color as the aircraft in the color slide from my Dad's collection. An almost perfect match for that color turned out to be MODEL MASTER RLM 24 Dunkelblau. The seats provided in the kit were simple flat slabs of plastic, so I endeavored to add the distinctive heavily pleated padding. After carefully counting the number of pleats, and dividing that into the width of the seats, I cut thin strips of plastic of the approximate width, and glued them to the seats. When the glue was thoroughly dry, I sanded the padding, then sanded some more. It was difficult in this small scale to achieve the desired affect, but several hand-painted coats of the afore-mentioned RLM 24 Dunkelblau gave a reasonable (1/72 scale!) facsimile of the original padded upholstery.
With the canopy parts all separated, I spent a fair amount of time pre-fitting the windscreen and canopy parts to the fuselage to make sure they would all fit together on final assembly. Some trimming and sanding was required on both the canopy and the fuselage to achieve a nice fit. This was time well-spent, as it made attaching the parts fairly painless after they'd all been painted. |
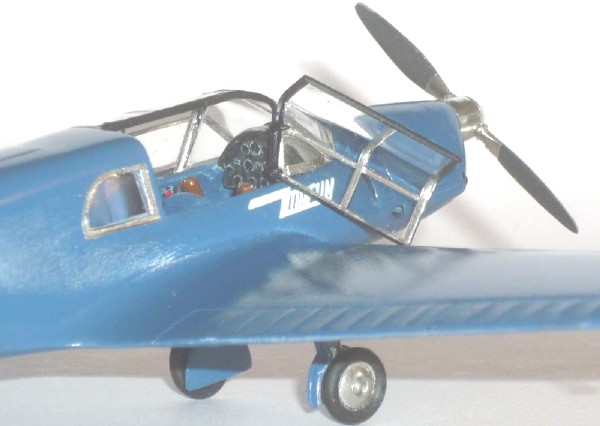
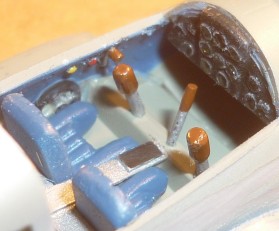 Several other noticeable details were added to improve the cockpit. A large trim wheel, the throttle quadrant, and several large buttons visible on the real aircraft were added to the left side of the cockpit wall. The instrumant panel was dry-brushed to bring out some of the detail, and a console visible between the seats was added, along with an additional control stick visible in photographs, which I installed between the two huge kit control sticks, and that completed the cockpit.
Before I added the wings, I drilled out the exhaust exits on the cowling. I intended to add seat belts at some later date, but they weren't necessary for a model that would first be displayed in a glass case. |
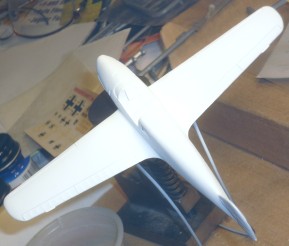
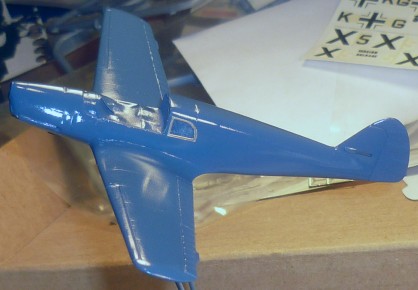
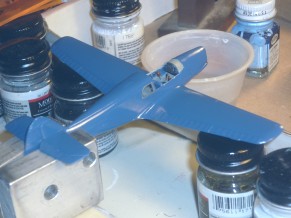
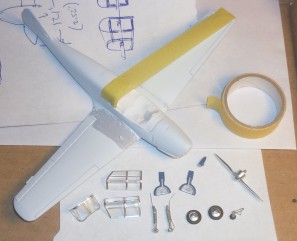 Here the wings have been assembled, seams have been sealed, the cockpit masked off, and a first coat of primer applied to show up any imperfections. One wing-root needed more filler, and the other needed more glue and the dihedral set to match it's mate, hence the tape.
While the putty and glue dried on the airframe, small sub-assemblies were painted and detailed. Here you can see the landing gear bits, the canopy parts, the prop, and a landing light, all assembled, painted, and ready for installation. |
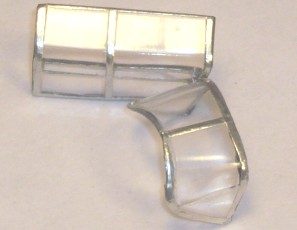
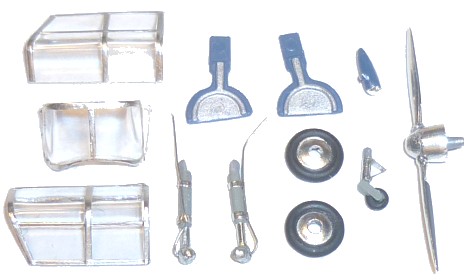 Here's the detail parts ready for assembly. The canopy piees were dipped in Future® floor polish, allowed to dry for a couple of days, and then the chrome canopy frames were added using thin strips of Chrome Bare-Metal Foil.
The propeller was also covered with Chrome Bare-Metal Foil, and the backs of the prop blades were painted flat black. The front of the landing light (small teardrop-shaped object between the prop and the landing gear doors) was also covered with Bare-Metal Foil to simulate the reflective lens. |
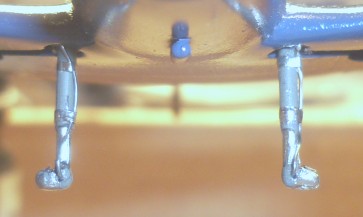
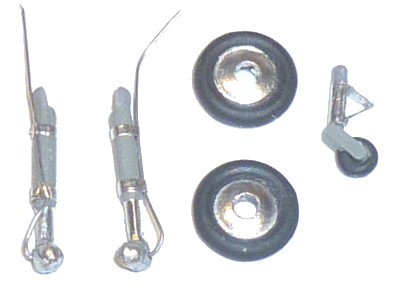 The chrome wheel covers were also given the Chrome Bare-Metal Foil treatment. Small strips of the foil were wrapped around the oleo struts on both the main gear and the tail wheel to simulate the highly-polished strut shafts. In the color slide, the tail strut linkages were also highly polished, so they received the same treatment.
Photographs of the landing gear showed prominent brake lines, so some very fine aluminum electrical wire was stripped of it's insulation, and used for brake lines. A small hole was drilled in the brake drum, the wire inserted and glued in place with a small drop of C/A. The rest of the wire was carefully bent up along-side the landing gear leg and held in place with hose clamps, which were simulated with strips of Bare-Metal Foil, making for a most realistic landing gear leg. The axle nub was also covered with Bare-Metal Foil, as the end of the axle on this particular real aircraft was also chrome. |
|
|
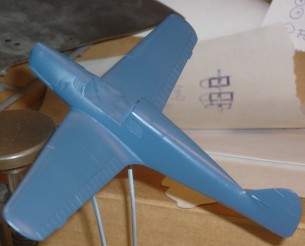
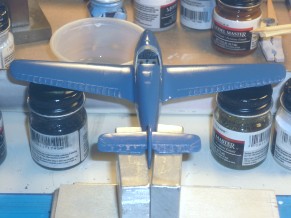
 . . . and finally, a coat of acrylic floor polish to give it the gloss finish the real aircraft had, after which I set the airframe aside for a couple of days so the floor polish could harden.
 |
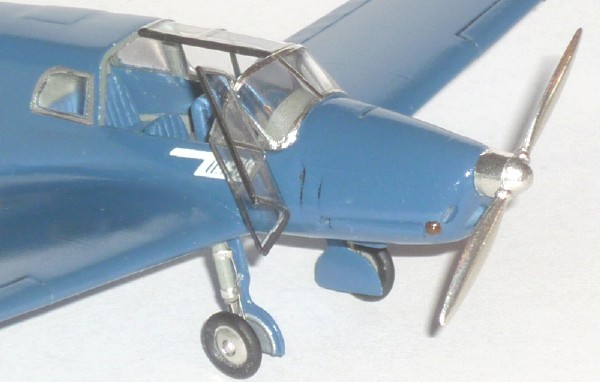
 While I'm waiting for the floor polish to dry, I fit the two canopy pieces together. Unlike most canopies, both halves of the Bf-108 canopy hinge forward. I'm only going to display the model with one of the canopy doors in the open position - the other will be glued shut.
To display the canopy in the open position, I'll have to fasten the two pieces together. A study of photographs of the real canopy hinged in the open position helped to determine the angle the canopy sits on it's hinges. Very tiny holes were drilled in both canopy parts in the two places where the hinges were located on the real canopy. The hinges were simulated by running very fine wire through the holes and twisting it into place to hold the two canopy parts together. In this picture, you can't see the canopy "hinges", but you can see the approximate angle that the canopy door opens. 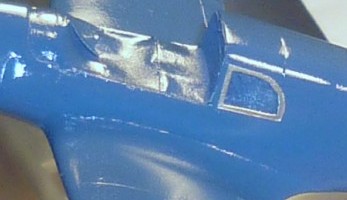 The aft side windows on this aircraft had chrome trim, so I traced the window openings, cut the window trim from Chrome Bare-Metal Foil, and added it to the window openings . . .
 |
 . . . the acrylic polish finally dry, I've pulled off the cockpit masking, and the airframe is now ready for all the little sub-assembly details to be added.
. . . right after the stabilizers are glued in place and have had a chance to dry. :-) |
|
|
 . . . gluing the main landing gear struts in place . . . don't forget the tail wheel!
 |
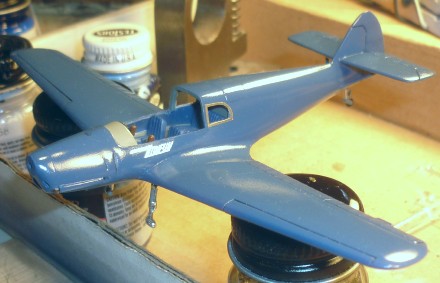 . . . the stabilizer struts in place, and waiting for the landing gear to dry . . .
You can see in this photo that I've applied the two "Taifun" decals just under the front of the cockpit (one on each side). |
|
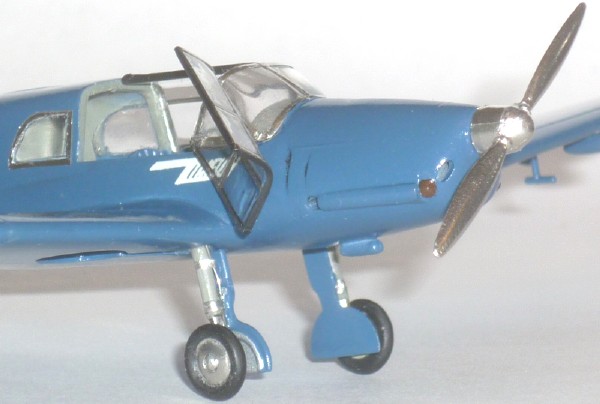
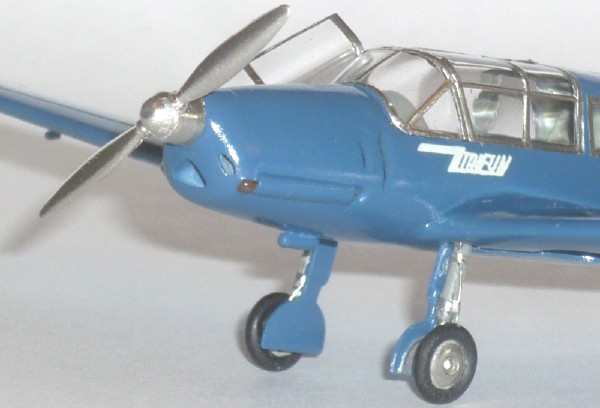
With the landing gear struts, tail wheel, and stabilizer struts all dry, the rest of the details could be glued in place. One of the surprisingly more difficult parts to glue in place were the rear side windows. I managed to get glue on these several times in a row on each side, which necessitated removing them, cleaning the floor polish off them with ammonia, re-dipping them in floor polish, letting them dry, and trying to glue them back in again. I was most relieved when I finally managed to get them both in. Once I got the side windows in place, the rest of the details went on quite quickly - these included the aileron balances on the bottom of the ailerons, the pitot tube and landing light, both under the left wing, the landing gear doors glued to the gear legs, the wheels onto the axles, and finally, the windscreen and canopy parts. Here is where the time spent pre-fitting the canopy parts paid off, as you don't want to be sanding too much to get a good fit on parts that are already painted. The last part to fit was the propeller, and then it was time for the finishing touches. I gave the engraved lines around the control surfaces, the aft side of the various engine cowling louvers, and the exhaust holes a wash of heavily thinned black oil paint, and the front of the exhaust pipes a touch of rust color, and the model was done. |
|
|
|
|
|
|
| The Heller Bf-108 made up into quite a pleasing little model. And I still haven't added the seat belts yet. :-) |
| Back to the Plastic Scale Modeling page |
|